Protobuf
目录
[TOC]
数据的传输与解析——浅谈序列化与反序列化
在网络通信的过程中,服务器端和客户端之间常常需要进行对象的传输。对象中常常含有不同的变量:
那么我们如何正确地进行这种传递呢?要想实现对象的传输,在发送端我们需要使用一定的规则,将对象转换为具体的字节数组,这就是序列化(serialization);而在接受端再以这种规则将字节数组还原为对象,这就是反序列化(deserialization)。
常见的序列化-反序列化协议有XML、JSON、Protobuf。
- XML(eXtensible Markup Language,可扩展标记语言)使用标签
<xx>和</xx>来区隔不同的数据。
- JSON(JavaScript Object Notation,JavaScript对象简谱)使用JavaScript构造对象的方法来存储、传输数据。
- Protobuf(Protocol Buffers)是Google公司开源跨平台的序列化数据结构的协议。
我们通过一个实例说明三者的差异。我们不妨定义以下对象:
 1
 2
 3
 4
 5
 6
 7
 8
 9
10
11
12
|
#include <string>

class Helloworld
{
    int id;
    std::string name;
}

int main()
{
    Helloworld helloworld(101, "hello");
}
|
使用XML序列化该对象:
1
2
3
4
|
<helloworld>
   <id>101</id>
   <name>hello</name>
</helloworld>
|
使用JSON序列化该对象:
1
2
3
4
|
{
   "id": 101,
   "name": "hello"
}
|
使用Protobuf序列化该对象(16进制格式):
1
|
08 65 12 06 48 65 6C 6C 6F 77
|
根据上述实例,我们可以用一张表格总结三者的差异:
|
XML |
JSON |
Protobuf |
| 数据存储格式 |
文本 |
文本 |
二进制 |
| 可读性 |
好 |
较好 |
差 |
| 存储空间 |
大 |
较大 |
小 |
| 序列化/反序列速度 |
慢 |
慢 |
快 |
| 侧重点 |
数据结构化 |
数据结构化 |
数据序列化 |
本节我们将重点介绍Protobuf的使用方法。但XML及其各种变体(如HTML、XAML)和JSON也在软件部的后续开发中有着广泛应用。感兴趣的同学可以参考相关资料了解XML和JSON的更多使用方法。
protobuf的安装
protobuf可以通过以下方式安装(参考自Protobuf C++ Installation)
 1
 2
 3
 4
 5
 6
 7
 8
 9
10
11
12
|
$ sudo apt-get install autoconf automake libtool curl make g++ unzip
  # 安装所需要的工具包
$ git clone https://github.com/protocolbuffers/protobuf.git
  # 若网络不佳,可以将指令换为 git clone https://gitee.com/mirrors/protobuf_source.git ./protobuf
$ cd protobuf
  # (optional) git submodule update --init --recursive
$ git checkout 3.20.x # 根据版本需求选择不同的分支
$ ./autogen.sh
$ ./configure
$ make -j$(nproc)
$ sudo make install
$ sudo ldconfig
|
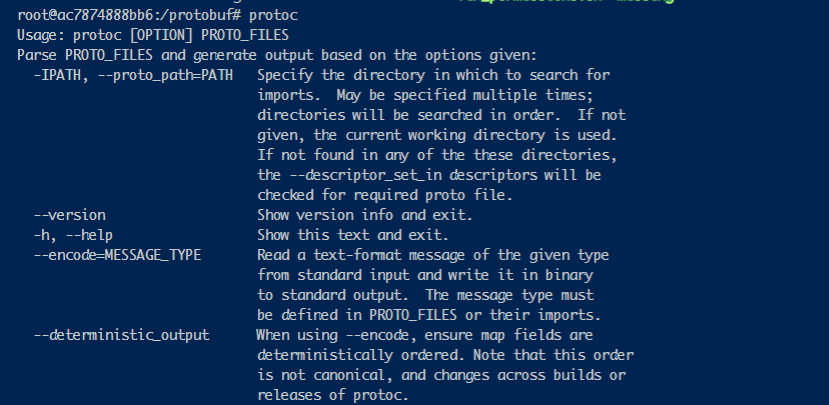
以上操作会将protoc可执行文件(后续教程会介绍其使用方法)以及与protobuf相关的头文件、库安装至本机。在终端输入protoc,若输出提示信息,则表示安装成功。
proto文件
基础使用
在使用protobuf时,我们首先需要在.proto文件中将需要被序列化的数据结构进行定义。
一个.proto文件示例如下:
 1
 2
 3
 4
 5
 6
 7
 8
 9
10
11
12
13
14
15
16
17
18
19
20
21
22
23
24
25
|
// import "other_protos.proto"; // 如果需要引用其它的protobuf文件,可以使用import语句。

syntax = "proto3"; // 指定protobuf遵循的语法格式是proto2还是proto3。在本教程和之后的开发中,我们都使用proto3语法格式。
package student; // 包名声明。如在本例中,proto文件生成的类都会被放在namespace student中,这一举措的意义在于防止命名冲突

enum Sex // 自定义枚举类型
{
    MALE = 0;
    FEMALE = 1;
}

message Course // protobuf中,使用message定义数据结构,类似于C中的结构体
{
    int32 credit = 1;
    string name = 2;
}

message StudentInfo
{
    // 变量声明格式 <限定修饰符> <数据类型> <变量名>=id
    int32 age = 1;
    string name = 2;
    Sex sex = 3;
    repeated Course courses = 4; // repeated表示重复(数组),本例也表明message可以嵌套message
}
|
protobuf语法标准
protobuf有两套语法标准:proto2和proto3,两套语法不完全兼容。我们可以使用syntax关键字指定protobuf遵循的语法标准。
package
为了防止命名冲突,protobuf文件中可以声明包名(package)。具体效果将在后续章节介绍。
编号
消息定义中的每个字段都有一个唯一的编号,从1开始。这些字段号用于识别你在二进制格式消息中的信息。
一个常见的约定是,我们会将经常使用的字段编号为1-15,不常用的字段编号为16以上的数字,因为1-15的编号编码仅需要1 byte,这样可以减小字节流的体积。
数据类型
Protobuf中常见的基础数据类型与若干编程语言的对应关系如下:
| proto Type |
C++ Type |
Python Type |
C# Type |
| double |
double |
float |
double |
| float |
float |
float |
float |
| int32 |
int32 |
int |
int |
| int64 |
int64 |
int/long |
long |
| uint32 |
uint32 |
int/long |
uint |
| uint64 |
uint64 |
int/long |
ulong |
| sint32 |
int32 |
int |
int |
| sint64 |
int64 |
int/long |
long |
| fixed32 |
uint32 |
int/long |
uint |
| fixed64 |
uint64 |
int/long |
ulong |
| sfixed32 |
int32 |
int |
int |
| sfixed64 |
int64 |
int/long |
long |
| bool |
bool |
bool |
bool |
| string |
string |
str/unicode |
string |
| bytes |
string |
str (Python 2) bytes (Python 3) |
ByteString |
更多语言的对应关系参看Protobuf scalar types。
此外,Protobuf还支持使用enum关键字定义枚举类型。每个枚举定义都必须包含一个映射到0的常量作为枚举的默认值。
为了尽可能多地压缩数据,Protobuf对各数据类型地默认值做了以下处理:
numeric types: 0bool: falsestring: 空字符串byte: 空字节enum: 第一个定义的枚举值(0)message: 取决于目标编程语言
repeated
repeated关键字可以定义重复多次的信息(即数组),其顺序是有序的。
命名法
为了便于阅读,protobuf规定了一系列命名法:
- message、enum采用大驼峰命名法,如
message StudentInfo。
- 字段采用下划线分割法,且全部小写,如
string student_name。
- 枚举值采用下划线分割法,且全部大写,如
FIRST_VALUE。
进阶使用
protobuf中还有一些高级语法:
oneof
如果你有一个信息,它可能包含若干种字段,并且最多只有一个字段会同时被设置(回忆C/C++中的联合体union),你可以使用oneof字段来节省空间。
oneof块中可以定义除了map字段(后续会讲到)和repeated字段外的所有类型字段。
 1
 2
 3
 4
 5
 6
 7
 8
 9
10
11
12
13
14
15
16
|
syntax = "proto3";
package oneof_demo

message MessageA
{
	string name_a = 1;
}

message MessageOneof
{
	oneof test_oneof
	{
		string name = 1;
		MessageA message_a = 2;
	}
}
|
map
map字段可以定义关联映射类型(类似于Python中的字典dict())。
map字段的定义方式如下:map<key_type, value_type> map_field = N;。其中,key_value可以为整数类型或字符串类型,value_type为除map类型的任意类型。
1
2
3
4
5
6
7
|
syntax = "proto3";
package map_demo

message StudentInfo
{
	map<int32,string> id_name_pairs = 1;
}
|
除此之外,protobuf中还有很多高阶语法:
Any- 保留字段(Reserved Values)
- 嵌套类型(Nested Types)
- …
此处由于篇幅所限,我们不做过多展开。
使用proto文件进行序列化和反序列化
生成目标语言文件
编写好的protobuf文件不能直接应用于工程中,我们需要使用protoc工具生成对应的文件(以C++和Csharp为例):
1
2
3
|
$ protoc --help # 查看使用方法
$ protoc test.proto --cpp_out=. # 在当前目录下生成.cpp文件和.h文件
$ protoc test.proto --csharp_out=. # 在当前目录下生成.cs文件
|
若使用--cpp_out选项,则会生成<protobuf_name>.pb.h文件和<protobuf_name>.pb.cc文件;若使用--csharp_out选项,则会生成<protobuf_name>.cs文件。生成的文件中会将proto文件中定义的message转换为对应的类,供目标语言程序使用。
C++
在C++程序中使用protobuf工具的例程如下:
 1
 2
 3
 4
 5
 6
 7
 8
 9
10
11
12
13
14
15
16
17
18
19
20
21
22
23
24
25
26
27
28
29
30
31
32
33
34
35
36
37
38
39
40
41
42
43
44
45
46
47
48
49
50
51
52
53
54
55
56
57
58
59
60
|
#include <iostream>
#include <fstream>
#include <vector>
#include <google/protobuf/message.h> // for protobuf

#include "test.pb.h" // for protobuf source file

int main()
{
    // 可以看到,protobuf文件中的信息都被封装在namespace student中,这是之前protobuf中的`package`语法所规定的。

    // 1. 如何实例化一个proto文件中定义的类
    student::StudentInfo student1;

    // 2. 如何设置类的各个属性
    // a. 添加单一字段:使用set_<xxx>()语句
    student1.set_age(18);
    student1.set_name("Alice");
    student1.set_sex(student::Sex::female);

    // b. 添加repeated字段:使用add_<xxx>()语句
    student::Course* course1 = student1.add_courses();
    course1 -> set_name("calculus");
    course1 -> set_credit(5);

    student::Course* course2 = student1.add_courses();
    course2 -> set_name("Fundamentals of Electronic Circuits and System");
    course2 -> set_credit(2);

    // 3. 如何使用类的各个属性:使用<xxx>()语句
    std::cout << "----------------student info----------------" << std::endl
              << "age: " << student1.age() << std::endl
              << "name: " << student1.name() << std::endl
              << "sex (0:male, 1:female): " << (int)student1.sex() << std::endl
              << "courses: " << std::endl;
    for(int i = 0;i<student1.courses_size();i++)
    {
        std::cout << " " << i << ". "
                  << "name: " << student1.courses(i).name() << "  "
                  << "credit: " << student1.courses(i).credit() << std::endl;
    }
    std::cout << "--------------------------------------------" << std::endl;

    // 4. 序列化
    std::cout << "serialize to file." << std::endl;
    std::fstream output("./output", std::ios::out | std::ios::binary );
    student1.SerializeToOstream(&output); // 序列化为流

    std::cout << "serialize to array." << std::endl;
    size_t size = student1.ByteSizeLong();
    unsigned char* data = new unsigned char [size];
    student1.SerializeToArray(data, student1.ByteSizeLong()); // 序列化为数组

    // 5. 反序列化和debug
    std::cout << "deserialize from array." << std::endl;
    student::StudentInfo studentInfoFromArray;
    std::cout << std::endl;
    studentInfoFromArray.ParseFromArray(data, size);
    std::cout << studentInfoFromArray.DebugString() << std::endl; // 输出字符串化的信息
}
|
需要指出的是,想要成功生成可执行文件,需要链接protobuf的静态库和动态库。在linux系统上应用使用到protobuf的C++工程,最好的方法是使用CMake。在本例中,库的依赖关系由CMake工具处理。
Csharp
在Csharp程序中使用protobuf工具的例程如下:
 1
 2
 3
 4
 5
 6
 7
 8
 9
10
11
12
13
14
15
16
17
18
19
20
21
22
23
24
25
26
27
28
29
30
31
32
33
34
35
36
37
38
39
40
41
42
43
44
45
46
47
48
49
50
51
52
53
54
55
56
57
58
59
60
61
62
63
64
65
|
using System;
using System.IO;
using Google.Protobuf;
using Student;

namespace example
{
    class Program
    {
        static void Main(string[] args)
        {
            // 1. 如何实例化一个proto文件中定义的类
            var student1 = new StudentInfo();

            // 2. 如何设置类的各个属性
            // a. 添加单一字段(回忆Csharp一讲中的“字段”)
            student1.Age = 18;
            student1.Name = "Alice";
            student1.Sex = Sex.Female;

            // b. 添加repeated字段(使用Add()方法)
            var course1 = new Course();
            course1.Name = "calculus";
            course1.Credit = 5;
            student1.Courses.Add(course1);

            var course2 = new Course();
            course2.Name = "Fundamentals of Electronic Circuits and System";
            course2.Credit = 2;
            student1.Courses.Add(course2);

            // 3. 如何使用类的各个属性(回忆Csharp一讲中的“字段”)
            Console.WriteLine("----------------student info----------------");
            Console.WriteLine($"age: {student1.Age}");
            Console.WriteLine($"name: {student1.Name}");
            Console.WriteLine($"sex (0:male, 1:female): {student1.Sex}");
            Console.WriteLine($"courses: ");
            foreach (Course course in student1.Courses)
            {
                Console.WriteLine($"name: {course.Name}  credit: {course.Credit}");
            }

            // 4. 序列化
            Console.WriteLine("serialize to array.");
            byte[] data = new byte[student1.CalculateSize()];
            MemoryStream ostream = new MemoryStream();
            using (CodedOutputStream output = new CodedOutputStream(ostream, true))
            {
                student1.WriteTo(output);
                output.Flush();
            }
            data = ostream.ToArray();

            // 5. 反序列化和debug
            Console.WriteLine("deserialize from array.");
            var student2 = new StudentInfo();
            MemoryStream istream = new MemoryStream(data);
            using (CodedInputStream input = new CodedInputStream(istream))
            {
                student2?.MergeFrom(input);
            }
            Console.WriteLine(student2);
        }
    }
}
|
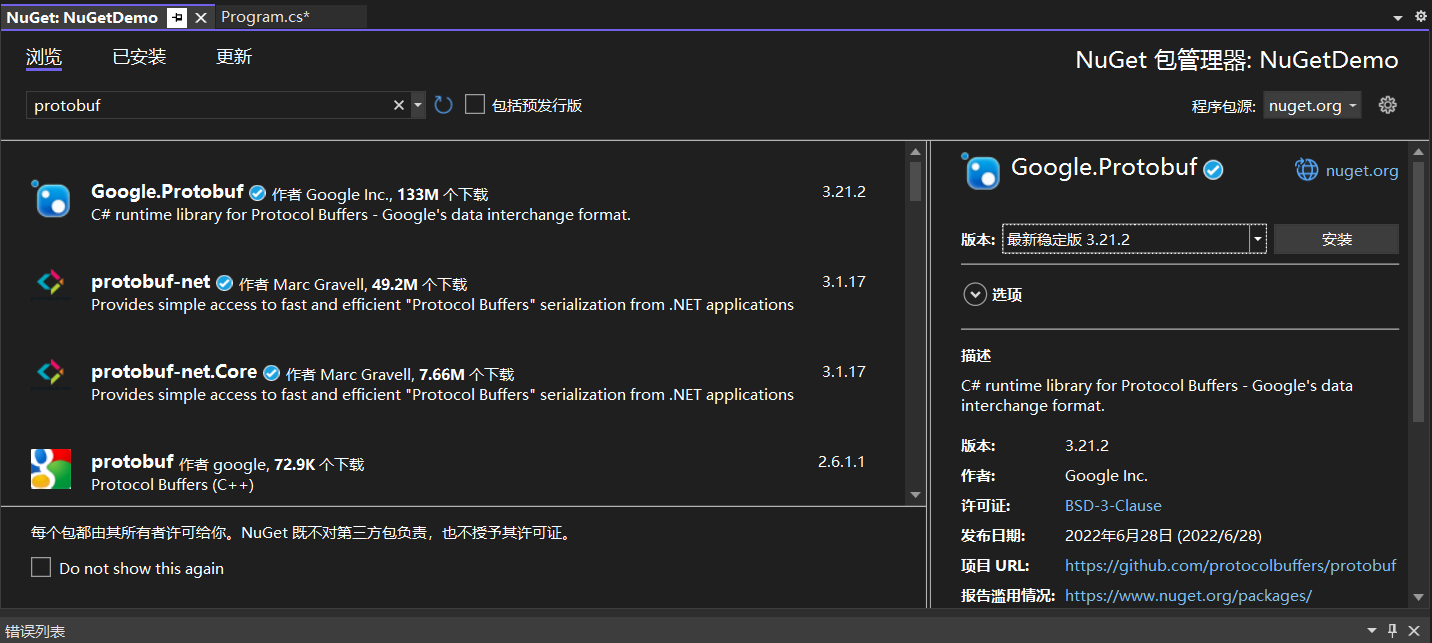
在Csharp程序中,需要在NuGet程序包中搜索并下载Google.Protobuf安装包。
补充说明:如何在Visual Studio中使用NuGet为Csharp程序安装第三方库?
NuGet是一个自由开源软件包管理系统,作为Visual Studio的一个扩展,可以简化在Visual Studio中添加、更新和删除库的操作。
我们在开发Csharp程序时不可避免地要用到第三方库,NuGet是一种很好用的工具。以下将以protobuf为例简要介绍NuGet的使用。
-
右键项目,点击“管理NuGet程序包”。

-
点击“浏览”,搜索你想要安装的包名。可以根据项目所需要切换不同的版本。
-
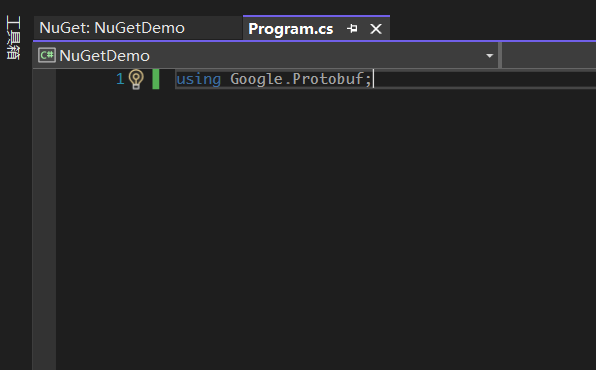
点击安装。在编辑器内输入using Google.Protobuf,若无报错,说明安装成功。
写在最后
由于篇幅所限,我们仍然有许多内容没有展开:
略去上述内容不会对我们的教学产生太大影响,感兴趣的同学可以参考Protobuf官方文档学习更多知识。